Friday, May 21, 2010

Asian Hairstyles: What do girls want?

Constantly updating our look means refreshing our hairstyle every few months. Usually most of us go into the salon for a trim or renew our tired highlights, but occasionally, we go for something more apparent. Those with straight hair may try a perm, while those  with not-so-straight hair may opt for rebonding (a.k.a straightening), others may go for a bleach and colour, and those grew tired of their long locks carefully consider a shorter style.

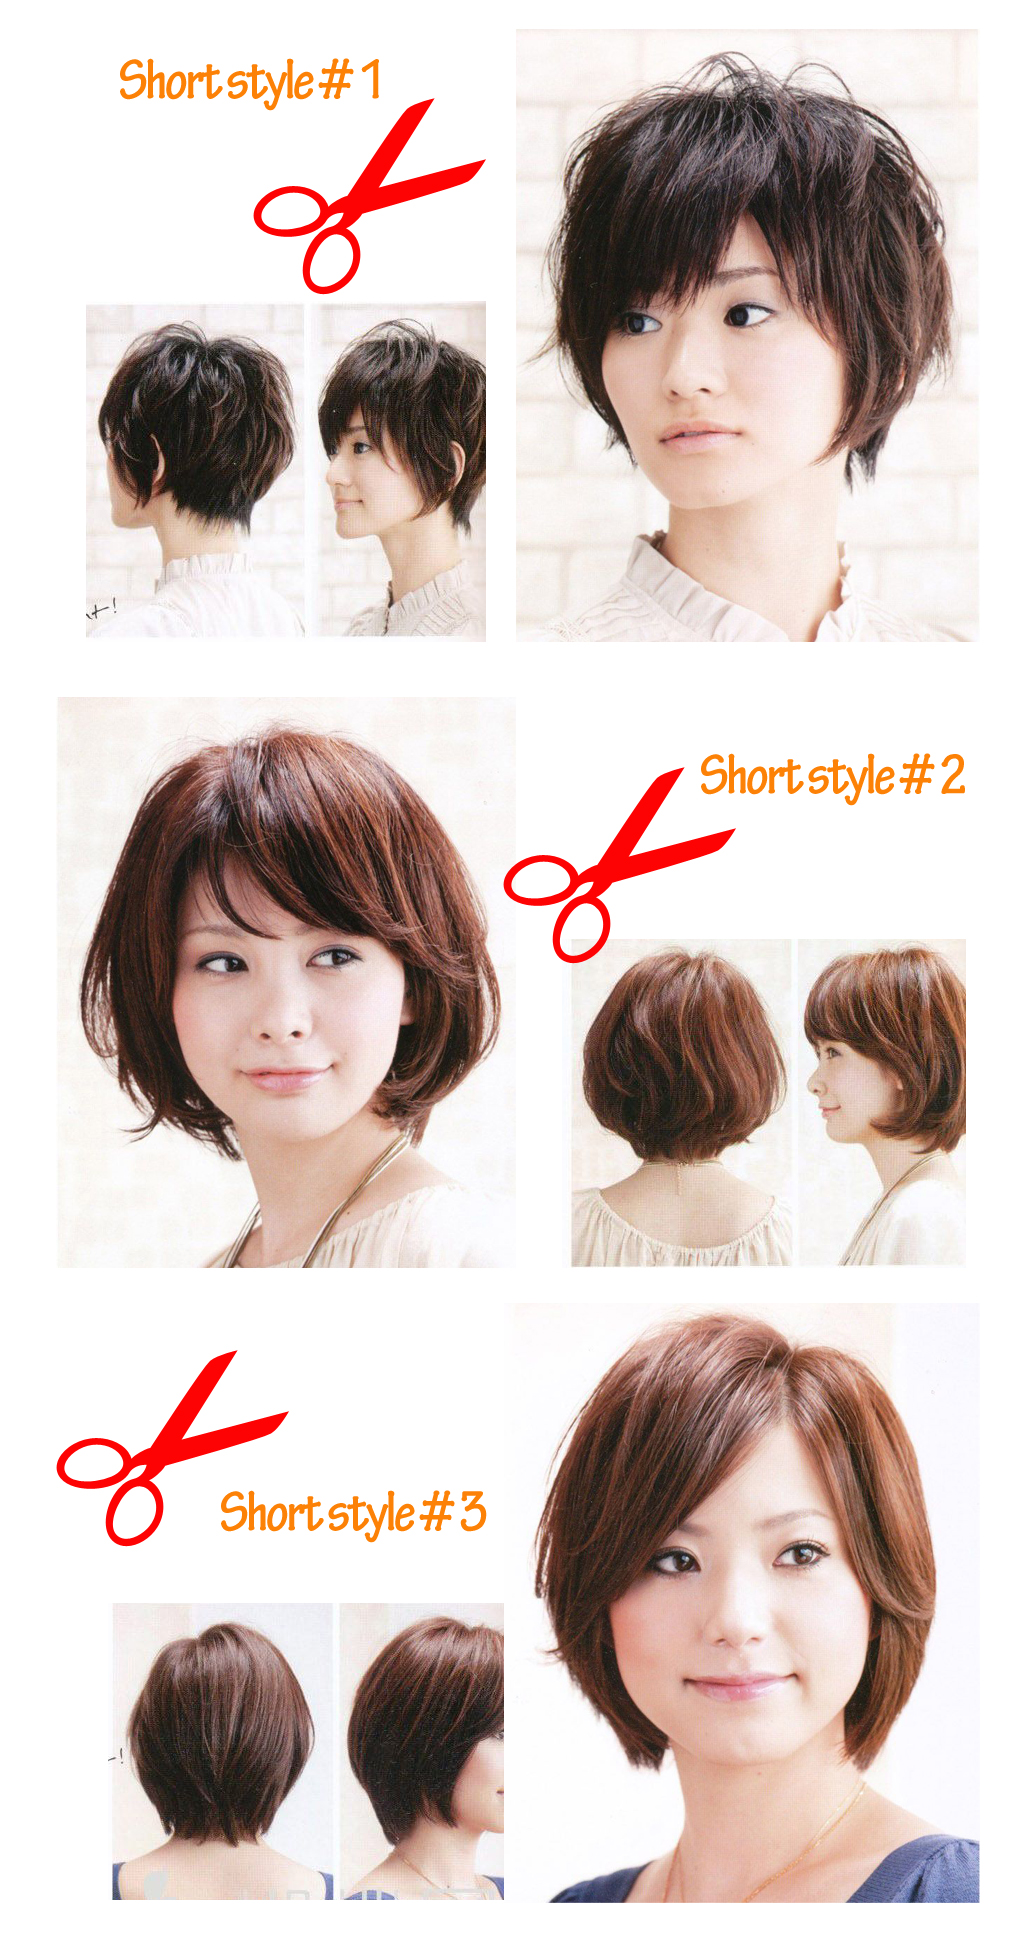
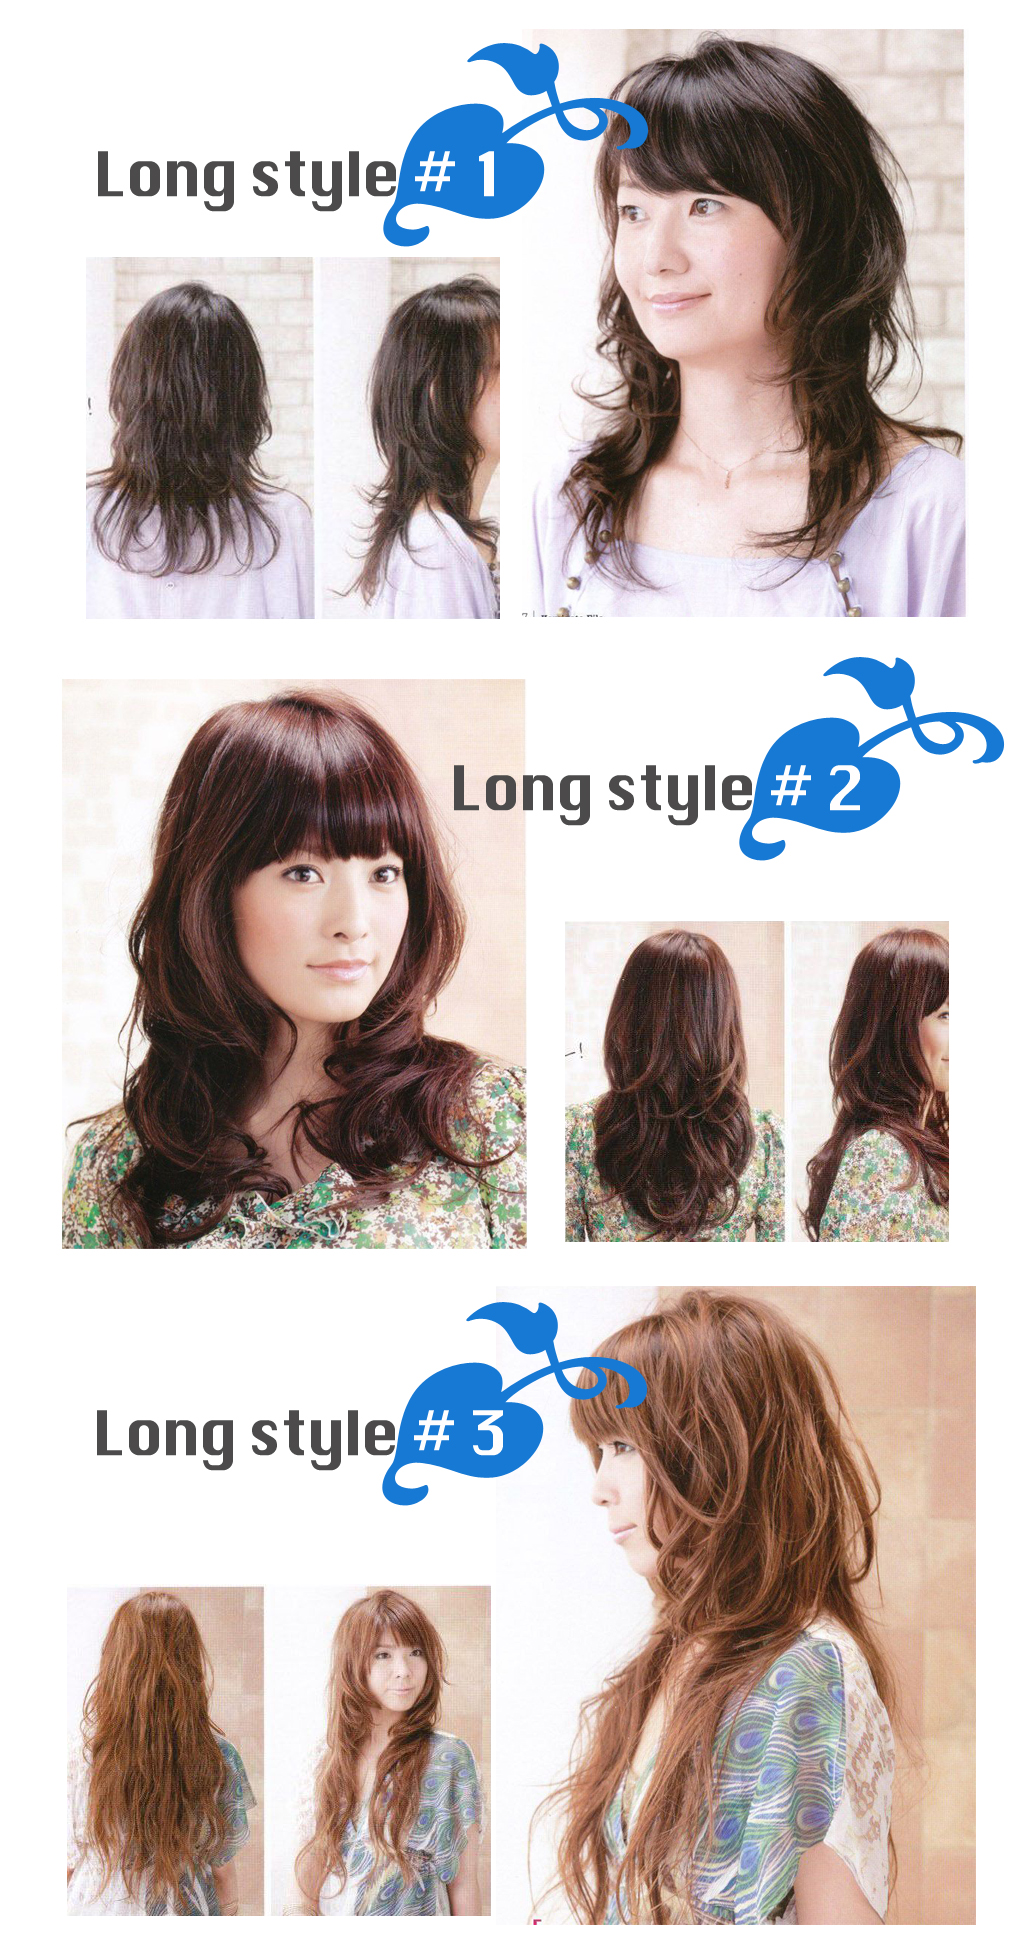
Every girl knows too well that feeling of frustrating indecisiveness as we frantically flip through magazine after magazine to find a perfect style. Ironically, we may not even know what we want. All we know is, we want a change, and look better with the new change, of course. While I doubt we will ever be able to resolve this dilemma as long as we still have hair to work with, in this post, we aim to offer a few popular choices for your consideration for your next hair appointment.

We have selected 3 styles for each length: Short, Medium and Long, giving you a total of 9 styles to choose from. If you would like to see more hairstyles, well...come back and check in regularly, because we will be uploading many more.


Friday, May 7, 2010

Hairstyle tips: Celtic Twist

This week we are showing you another beautiful and feminine hairstyle that you can wear. This Celtic-inspired hairstyle is simple, easy and great for all kinds of look. 


How to re-create this look?

Step 1: 
If you already have soft wavy hair, you can skip this part. But do make sure that you apply some leave in conditioner, hair serum or oil at the tips of hair to keep them shiny and manageable.

If you have straight hair, let's begin here. Curl the bottom-half of your hair with either an iron curler or rollers. If you would like to use hair rollers and want to know how to do so, visit our previous post here.

Step 2: 
Segment the hair at the crown (top of the head) and hold that segment of hair up by the tips, insert a flat comb at the mid-section of the hair, and gently draw it downwards towards the scalp.  Repeat this a few times. Some hairs will begin to bunch up at the crown, which helps to create an illusion of volume at that part of the head.

Step 3:
Further divide the segmented hair at the crown in to 2 sections - right and left, and create 2 plaits, one on each side. 

Step 4: 
Join the plaits at the back of the head and twist the plaits together.

Step 5:
Twist plaits in a circular motions to create a bun at the back of the head and secure with a bobby pin. 

Step 6:  
Select your favourite hair accessory and fasten it onto your bun and you are done!


Tuesday, May 4, 2010

Mid-season sale

To show our appreciation to all our Facebook fans and Twitter followers, we have decided to offer a 20% discount storewide at our online store to reward our fans and followers. Then we thought, what about our avid blog readers? Don't they deserve to be rewarded as well? The answer is yes, you deserve it to. To take advantage of this exclusive offer, have a look at our promotional ad below where you will find a discount code. Simply enter this discount code at the check out to receive your discount. Happy shopping!


www.vanityboulevard.com.au


Friday, April 23, 2010

How to clean makeup brushes

Why clean your makeup brushes?

Take a moment to think about how clean your makeup brushes are. Each time you use them, the oils from your face and makeup that you use accumulates on the bristles of the brushes, and when you are done with them, they sits on your dressing table collecting dust and germs that floats around in the air.

So cleaning your makeup brushes regularly will prevent all the dust, oils, dead skin cells and bacteria that may build up over time from spreading onto your face. In addition, clean brushes help to improve make up application and extend the life span of your brushes.

How often should you be cleaning your brushes?

At least once a month and more often if you wear make-up daily.


Step-by-step to cleaning your makeup brushes:

1. Rinse the brushes with warm water to get rid of all dust and residues.

2. Add one pump of gentle face wash or baby shampoo into a clean bowl or container, making sure that the bowl or container is free from grease or oil. You may want to clean and dry the bowl before hand. Fill bowl or container with warm water. The water should be comfortable like warm bath, not scalding hot. You may also add a few drops of tea tree oil to disinfect and condition the brushes.

3. Soak the brushes for 2-3 minutes to loosen any remaining dirt and oils trapped in the bristles.

4. Swirl the brushes around to use your fingers to lightly separate the bristles and swirl again.

5. Pour away the water, rinse the bowl and fill the bowl again with fresh warm water. Put the brushes in and swirl to rinse out the soap. Repeat if necessary until the water is clear when you swirl it. Note that this method is better than rinsing with running water because it makes sure that the water gets into the centre bristles, while running water only gets to the surface bristles.

6. Gently squeeze the excess water from the bristle, lay out flat (not upright) on a paper towel and let it air dry over night. (Do not use heat on the brushes). Slide a pencil under the brushes just at the root of the bristles so that all the bristles are lifted from the paper towel to let the bristle dry faster.

7. Once dried, gently roll your fingers over the bristles to reshape the brushes.

8. To keep the brush clean between uses, lightly dust off your make-up from the brushes by stroking both sides of the brush on a clean tissue, as if you are painting on the tissue, after each use.

If your makeup brushes are well-worn and you think it may be time to change them, visit www.vanityboulevard.com.au to check out our collection of makeup brushes.


$21.99 Available in Black, White and Bronze


$3.99 for a pack of 4


$1.99 for a pack of 2


Friday, April 16, 2010

How-to set a Japanese High-Bun


Welcome to our first post on hairstyle tips.
Everyone loves a Japanese High-Bun, it is a great way to hide those untamed hair on bad hair days and it looks good with all kinds of look. However, it is not always easy to set one. In this post, we will show you how to set a proper Japanese high-bun using rollers.

Curling the hair prior to setting the high-bun is gives more volume to your hair and create a suitable texture for this style, especially if you have finer hair that tends to be flat. If you already have wavy or curly hair, you can skip the first part and proceed right away to setting the high-bun.

In this first part, we are setting the hair with rollers to curl the hair. This technique is more time-consuming than styling with a brush and blow dryer. However hair rollers or curlers are an excellent choice for people who aren't good at that technique or who want their style to stay "set" for longer periods of time.

Step 1:

Prepare the hair by spritzing some styling spray on your hair, but you will only need to apply styling spray on those part that you will be curling.

Step 2:

Section out the hair on the top of your head, around the crown area and roll it up with a curler roll. Then depending on the volume of your hair, segment your remainder hair into at least 3 sections, more if you have thicker hair or if you are using smaller curlers.

Roll the hair, section by section by smoothing the tips of the hair onto the roller first and slowly roll the hair up about 1/2 way of the hair's length. Secure the curler with a clip or pin. Let the hair set and dry for about 20 mins, more if your hair is thicker.

Step 3:

Once the hair is dry and set, remove the curlers and loose the curls by running your fingers along your hair, but do not comb or brush your hair.

Step 4:

Use a clip to separate your fringe and hold it in place. If you do not have fringe, you can skip this step.

Step 5:

Pull your hair up from the root.

Step 6:

Bring your hair into a high-pony tail and secure it at the back of your crown (the highest point on your skull) with an elastic band.


Step 7:

Twist your hair around to wrap your hair around the root of the pony-tail to create a bun.

Step 8:

Secure the bun with another elastic band.

Step 9:

Tuck the tips of the hair deep into the base of the bun and secure with a bobby-pin.


Step 10:

Spray a blanket of hair spray on your hair to hold the bun in place and reduce any fly-aways. As you do this, smooth out the fly-aways and tuck any loose ends into the base of the bun to create a neater look.

Step 11:

If you hair is straight and you had to curl your hair earlier, your hair fringe at the forehead is probably straight too. So to complete the look, wet the hair either with styling spray or water, if you don't like having chemicals on your face, roll your fringe with a round brush and blow-dry.

Done:

That is it. It took some effort but finally, you are ready to go.

We hope you have enjoyed this post. Come back for more next Friday.